I am not sure if it is how I have placed the handles or the design of the bag, but the balance isn't quite right, it always wants to topple forward when held by the handles
Showing posts with label Bags and Totes. Show all posts
Showing posts with label Bags and Totes. Show all posts
Sunday, 10 April 2016
Patchwork Rucksack
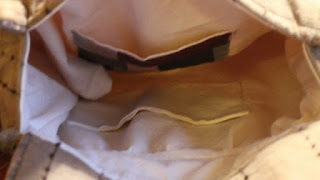
I had been wanting to make a rucksack for daily use to work, I found this pattern and really liked it. I had some Lecien fabrics that would work wonderfully. To make the bag a little waterproof I put in an extra layer of shower curtain between the top fabric and the batting. It makes a bit of a crinkly noise but has worked well.
I am not sure if it is how I have placed the handles or the design of the bag, but the balance isn't quite right, it always wants to topple forward when held by the handles
I am not sure if it is how I have placed the handles or the design of the bag, but the balance isn't quite right, it always wants to topple forward when held by the handles
Tuesday, 15 April 2014
Phonics Bag
 This is was a quick tote bag that I had to make when I saw this fabric. I made it for a friend at school who was leaving. We started teaching phonics for the first time in September and shared ideas, tips and resources. She left in March to complete her teacher training. I have used ½ metre a metre of the alphabet fabric.
I cut the alphabet fabric in a strip 13½ by 36" and layered it up with the wadding.
It was free motion quilted. The base was cut out of an old pair of jeans as this is dark and tough. This was layered up with denim, wadding, pelmet vilene, (occasionally I will use another layer of wadding.) It was quilted in a grid to add stability, and I like it!
The base was attached to the quilted bag outer and then the lining was made to the same measurements.
The handles were made from lengths of denim fabric (legs of the jeans) 5 inch wide. This was folded in half and lightly pressed just for positioning. A seam was made by turning the raw edge to the centre crease and pressing firmly. A long strip of wadding was placed down the centre along with a length of heavy duty cloth tape. This next bit can be tricky and you really need 3 hands. Fold the raw edge to the middle and bring the seam edge on top to enclose the wadding and tape. Press very firmly, and pin. Take this to the sewing machine and sew to secure all layers
Attach the handles and secure with a box and diagonal, count the stitches up and across - this helps to keep it square.
Lastly insert the lining - with pockets if you like, turn through an open bottom seam and press the top edge, top stitch and close the open seam. Ta daah
Tuesday, 22 May 2012
Japanese folded dolly bag
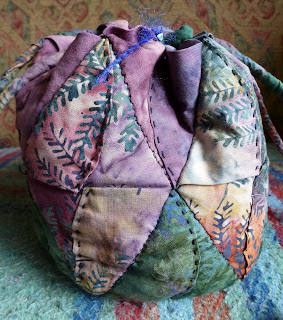
This was my first attempt at Japanese folded patchwork. I loved it. The pattern used diamonds of wadding as the base and this was enclosed with a hemmed circle of fabric. Running stitches in embroidery thread secured everything in place. The completed diamonds were slipped stitched together to form the bag
The top 6 points were sewn over and this formed the channel for the cord.
I encased the cord with the same fabric as the bag and to finish off my very dear friend A, showed me how to make these acorns. Easy and really neat on the end of cord.
Saturday, 19 May 2012
Dolly bags
I have made umpteen of these bags - in all sizes. This has side pockets of 6'' and a corresponding 6'' base.
I have also worked out a size to get the pockets and long sides from a FQ - which is a nice size for craft sales.
Thursday, 17 May 2012
Shopping bags/totes
Here is a selection of large shopping bags I have made - mostly as presents. I have used one pattern from Monkey Buttons, which has appliquéd rings and gathered handles.
Side 1
Side 2
These were designed by myself
Subscribe to:
Posts (Atom)


